chrome v8环境配置
近期chrome漏洞炒的比较火热,各种比赛也经常出一些V8的题目,于是下决心去研究一下V8。
目前对V8的了解是:代码量巨大,环境配置巨麻烦,主要涉及C++的pwn的堆漏洞利用知识。
基础环境
windows 10
wsl2 Ubuntu20.04
能上google的代理
安装相关依赖
sudo apt install bison cdbs curl flex g++ git python vim pkg-config ninja-build
安装depot_tools
depot_tools是google开源的一款工具,下载它主要是用于下载V8的源码。
由于google的东西都由于某些原因非常难下载,导致环境的配置非常麻烦,经常容易出一些奇奇怪怪的错误,所以这边配置一下代理。
因为本文使用的是wsl,因此在配置代理的时候比较方便,直接在 ~目录下创建sh脚本文件:
1 | !/bin/sh |
使用方法:
source ~/proxy.sh set:开启代理
source ~/proxy.sh unset:关闭代理
source ~/proxy.sh test:查看代理状态
脚本第四行里的端口号和第六行的http还是socks5因人而异,具体参考你所使用的魔法工具。
然后顺便再设置一下git:
git config –global user.email xxx@xxxx.com
git config –global user.name xxxx
git config –global http.postbuffer 1048576000
这里设置git是因为后面会有向git下载的指令,如果git没有设置postbuffer,在下载v8的时候会因为文件没有下载下来而报错。
配置完代理网络后,用curl测试一下
curl www.google.com
如果回显非空那就配置好了
正式下载depot_tools
git clone https://chromium.googlesource.com/chromium/tools/depot_tools.git
将depot_tools加入环境变量
echo “export PATH=$(pwd)/depot_tools:${PATH}” >> ~/.zshrc
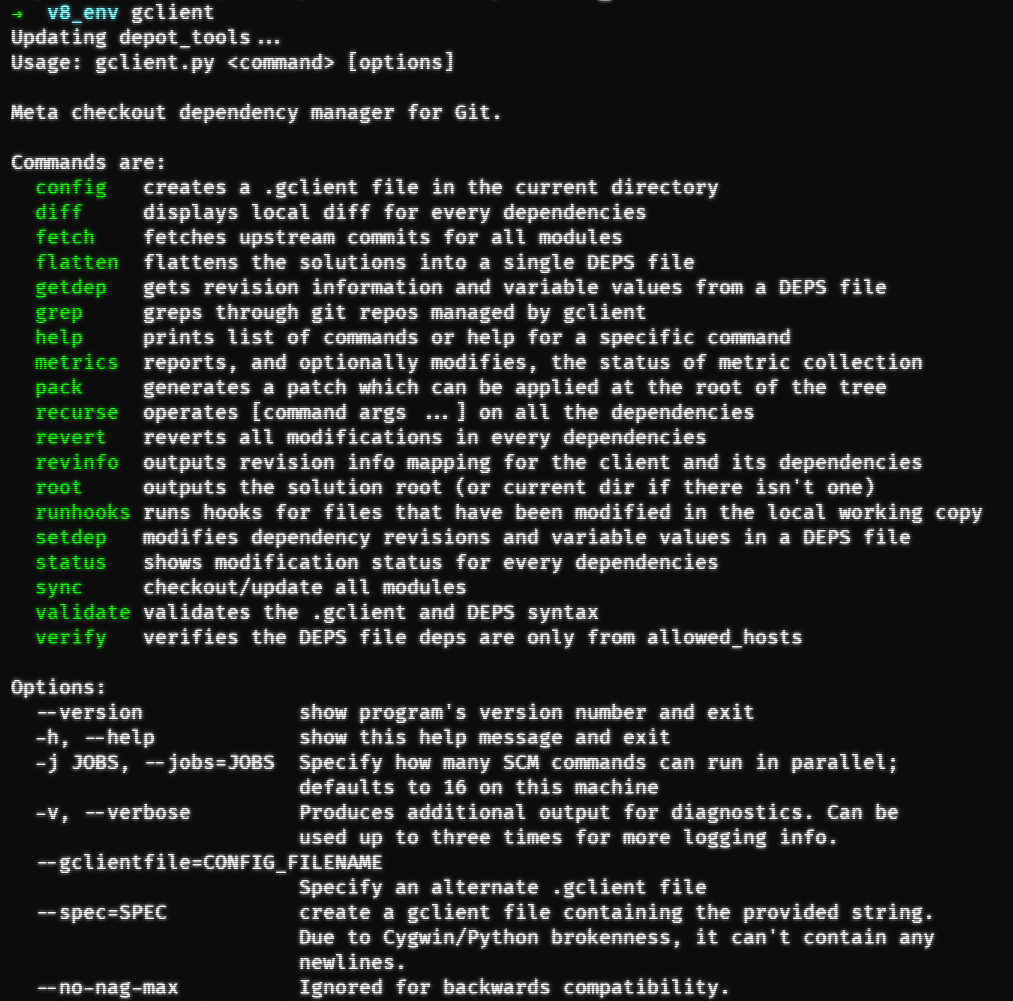
然后使用gclient,测试一下depot_tools能否正常更新,如果可以,稍作等待后回显应该是这样的:

下载v8源码
新建一个目录,在目录下使用指令
fetch v8
这个指令会将整个v8的源码下载下来,下载的时候确保你有足够的时间,并且网络(代理)足够稳定,否则很容易出奇奇怪怪的问题。
下载过程如果出错了,再次使用fetch v8会提示你使用另一个指令
gclient sync
同步上一次的下载进度

另外,还有时候会出现一个提示
NOTICE: You have PROXY values set in your environment, but gsutilin depot_tools does not (yet) obey them.
Also, –no_auth prevents the normal BOTO_CONFIG environmentvariable from being used.
To use a proxy in this situation, please supply those settingsin a .boto file pointed to by the NO_AUTH_BOTO_CONFIG environmentvariable.
主要意思是depot_tools没有接入代理,只要创建一个~/.boto文件,内容修改为
[Boto]
debug = 0
num_retries = 10
proxy = 127.0.0.1
proxy_port = 7890
然后将.boto的路径存入环境变量即可。
如果一路顺利下载完了v8,没有任何报错的话,就可以继续下一步了。
编译v8
cd进v8主目录然后执行命令:
gn gen out/x64.release –args=’v8_monolithic=true v8_use_external_startup_data=false is_component_build=false is_debug=false target_cpu=”x64” use_goma=false goma_dir=”None” v8_enable_backtrace=true v8_enable_disassembler=true v8_enable_object_print=true v8_enable_verify_heap=true’
ninja -C out/x64.release d8
其中gn命令主要是在out路径下生成x64.release目录,ninja指令将x64.release文件打包成一个可执行文件。
如果gn命令失败了,多半是v8文件下载不完全导致的,我在这里失败了很多次,最后还是重新下了V8解决。
我在执行ninja命令时,碰到了ninja罢工的问题:
ninja no work to do
经过查找github上的issue,找到了解决办法:
ninja -C out/Release -t clean
然后再执行之前的编译指令即可。
完成配置


